Some time ago, I remembered seeing some Insta-posts about origami-style mobiles. I can't remember in which account I saw them...sorry. So this isn't original-original but "Instagram-Inspired." If you follow me on Instagram, you would know that I am trying to make a beautiful kid's room. (There is a severe lack of playgrounds in this village). I am doing as much as I cant to make it Pinterest Pretty by myself and on a budget.
I have been looking for a mobile for Otis, but most of them aren't quite what I want. Herz & Blut made one that I like, but it seemed too hard for me to replicate it. So I made this one. Here is how can you make it yourself. It is pretty easy, but time-consuming, though it took me a couple of weeks to finish it.
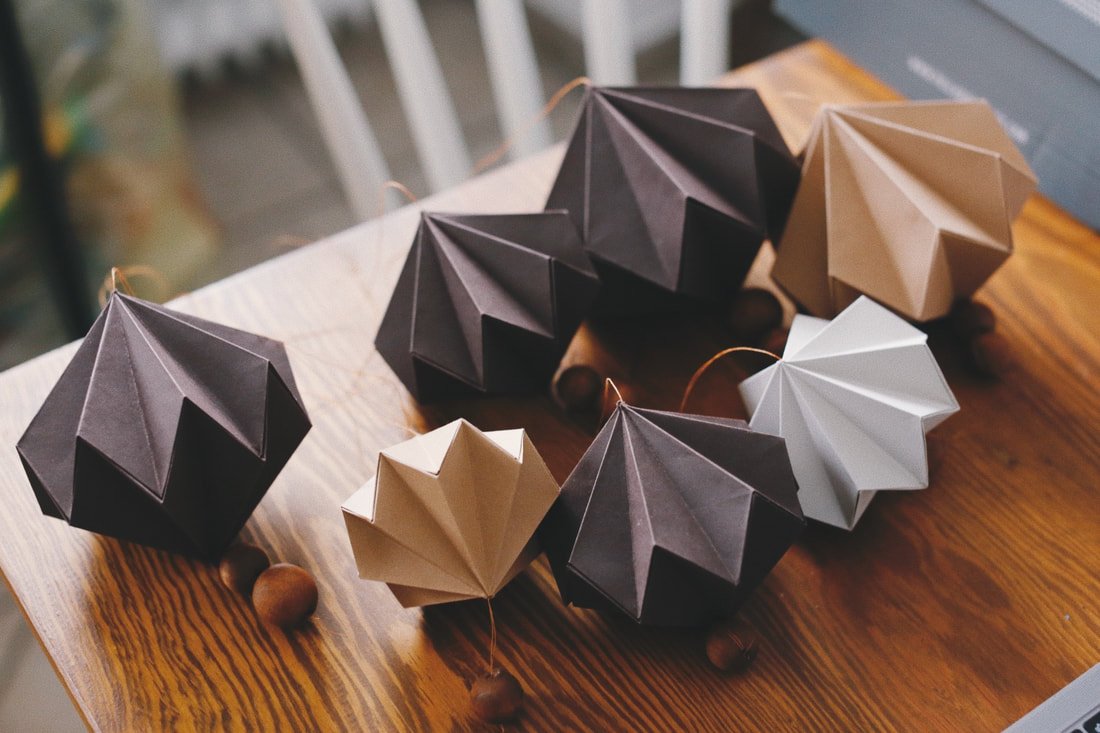
First is the origami. I am a total newbie on this so actually anyone can do it. I found this tutorial on youtube on how to make diamonds with paper. You can use any form, from cranes to paper boats. But these look so beautiful, and I can make them later for Christmas-tree decorations too.
First is the origami. I am a total newbie on this so actually anyone can do it. I found this tutorial on youtube on how to make diamonds with paper. You can use any form, from cranes to paper boats. But these look so beautiful, and I can make them later for Christmas-tree decorations too.

The next step is practice, practice, practice. And shop the supplies. You will need the following:
PAPER: Colored paper over 100 gr. Heavy. You can buy them in size A4 or a bigger one. I got big sheets at the drugstore, to be honest. I used three colors, but two would work as well. You can get them in scheme colors at Modulor like this winter pack here.
WOOD: Wooden beads, you can buy them here in Amazon or places like Etsy or Dawanda. You will need some wood stain if you don't want to leave it in natural color.
THREAD: A roll of thread in a color that fits your scheme colors.
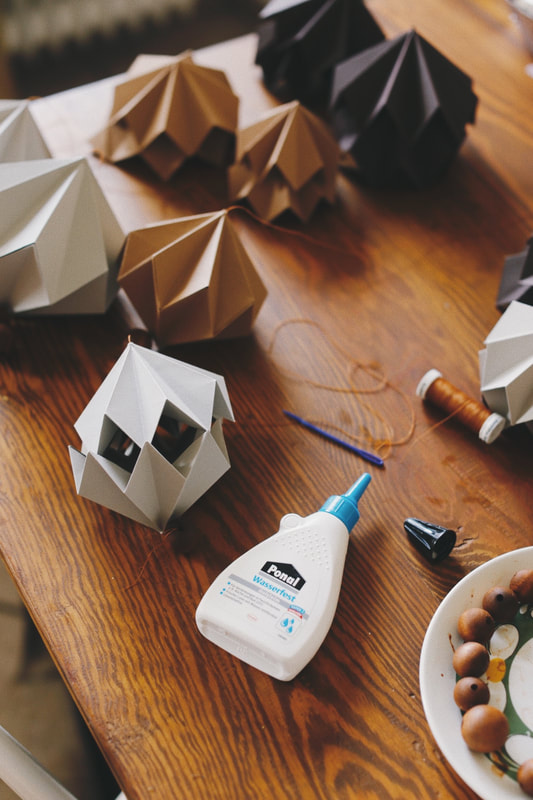
GLUE: I used regular glue as it takes time to dry, so you have time to adjust stuff. I tried the hot glue gun, but it was a disaster as it dries so fast you can't correct it at all.
NEEDLE: I used a knit needle, the bigger and thicker the better.
HANGER: Stick, log, or hook to hang your work of art at the end.
PAPER: Colored paper over 100 gr. Heavy. You can buy them in size A4 or a bigger one. I got big sheets at the drugstore, to be honest. I used three colors, but two would work as well. You can get them in scheme colors at Modulor like this winter pack here.
WOOD: Wooden beads, you can buy them here in Amazon or places like Etsy or Dawanda. You will need some wood stain if you don't want to leave it in natural color.
THREAD: A roll of thread in a color that fits your scheme colors.
GLUE: I used regular glue as it takes time to dry, so you have time to adjust stuff. I tried the hot glue gun, but it was a disaster as it dries so fast you can't correct it at all.
NEEDLE: I used a knit needle, the bigger and thicker the better.
HANGER: Stick, log, or hook to hang your work of art at the end.
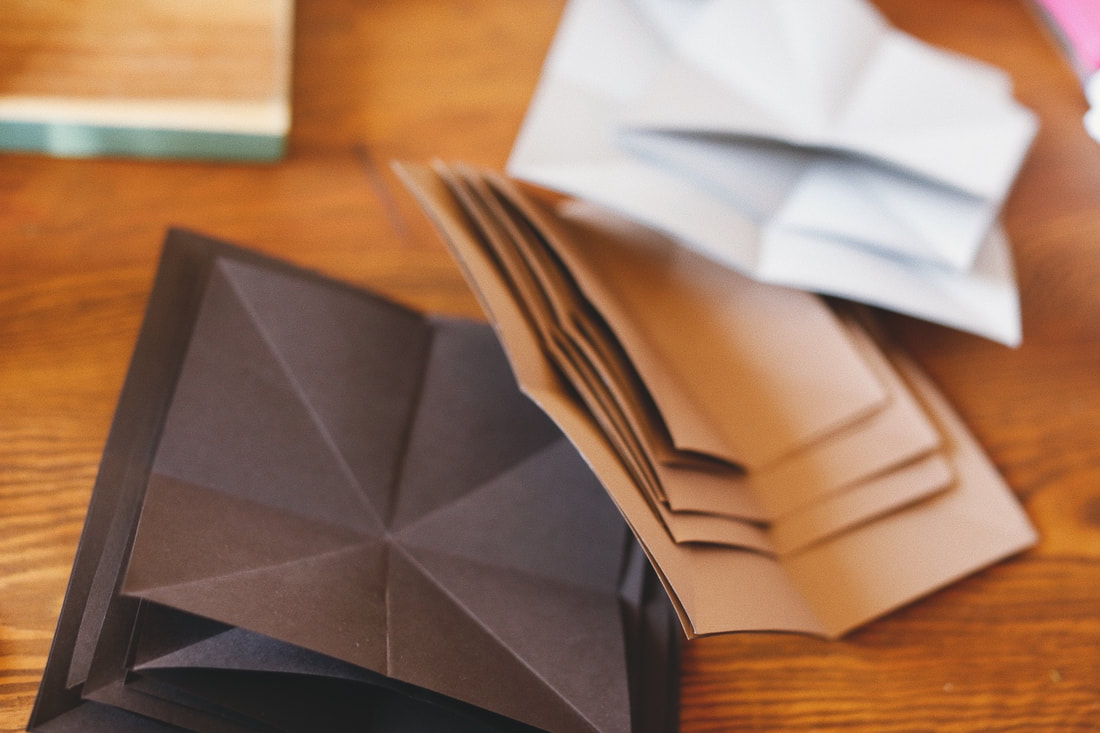
When you are testing with regular copy paper, you should check the sizes you would like to make. I made the big ones in 20 cm, the medium ones 15 cm, and the small one is 11cm. I think I made one on 16cm too. Cut them all and don't forget you need pairs. So pair them always and keep them that way, so you don't get confused and end up with a mess.
TIPP: Fold them all like this before starting and make a small hole in the middle with your needle.. this will make it SOOOOOO much easier for you later.
TIPP: Fold them all like this before starting and make a small hole in the middle with your needle.. this will make it SOOOOOO much easier for you later.
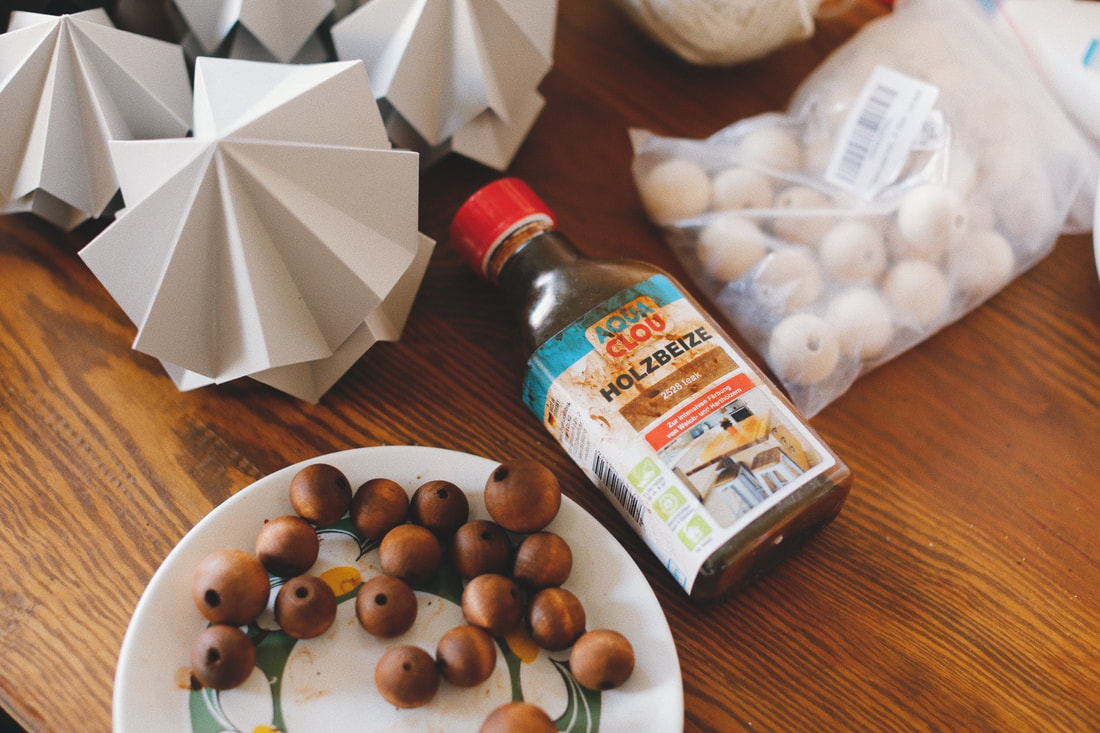
Once you finished folding the parts, start staining the beads, use gloves! Let them dry overnight. I didn't add a finish to it, but you can do it. I find it too messy to paint balls.
The beads are done, the two parts of the diamonds as well, and you are just so ready to make this happen.
And this is how we roll: Cut a piece of thread about 2x lengths of your arm. Double thread your needle. Take one bead or 2 or three and knot it at the end of your thread. Pierce or string the lower part of the diamond and then the top, as you can see in the picture. Add glue on one side and paste together. Repeat until all diamonds are done and with thread.
And this is how we roll: Cut a piece of thread about 2x lengths of your arm. Double thread your needle. Take one bead or 2 or three and knot it at the end of your thread. Pierce or string the lower part of the diamond and then the top, as you can see in the picture. Add glue on one side and paste together. Repeat until all diamonds are done and with thread.
I made an ombre effect here, using the darker color at the top and the lighter color at the bottom. But you can work your creativity here. Grab all the diamonds by its string and place them as you would like them at the end. Then make a knot at the very top of them.
TIP: It is easier to pull down a diamond than up, so start with all of them pretty close and start pulling one by one lower.
TIP: It is easier to pull down a diamond than up, so start with all of them pretty close and start pulling one by one lower.

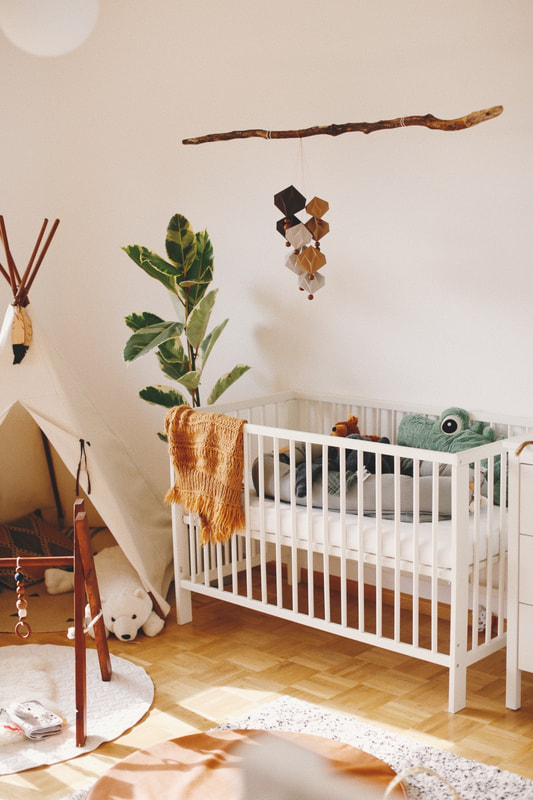
I found this wood beauty in my old backyard in Berlin, but you can use a regular hook on the ceiling, a log, a stick... anything you can fix over the baby cot. Please be sure to attach it correctly, and please be safe!
I used 4 yarn pieces, double thread tied to two hooks on the ceiling, but there are very good glues that would do the work, be sure to weight the whole thing and ask the specialist at your hardware store... always ask.
I used 4 yarn pieces, double thread tied to two hooks on the ceiling, but there are very good glues that would do the work, be sure to weight the whole thing and ask the specialist at your hardware store... always ask.
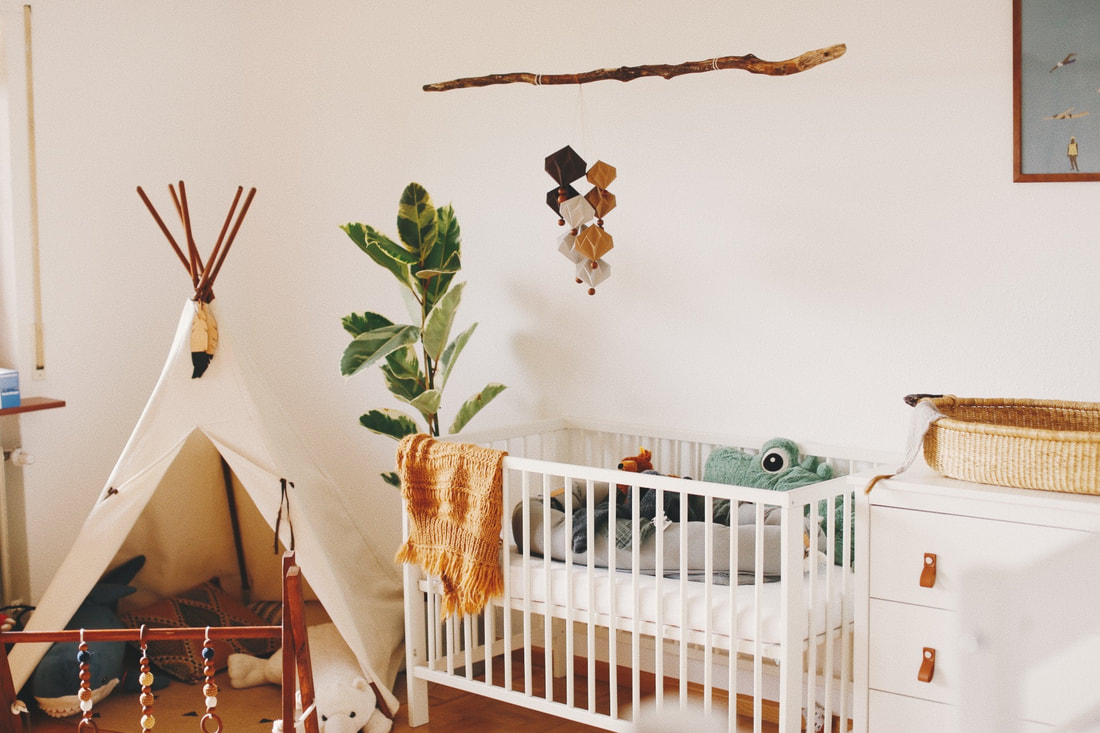
Placing the mobile: You don't need to put it in the middle of one side.. just check where exactly your baby's head will be and that is the place. Leave at least 50 cm space between your baby's nose and the last bead.
Tie the mobile really good. I went over the log 2 times, and the third was a knot, and I added tape at the back to fix it. Now you can turn your mobile like a carrousel many times, pushing one diamond with one finger and let it go. Otis gets hypnotized every time I do that.
Tie the mobile really good. I went over the log 2 times, and the third was a knot, and I added tape at the back to fix it. Now you can turn your mobile like a carrousel many times, pushing one diamond with one finger and let it go. Otis gets hypnotized every time I do that.

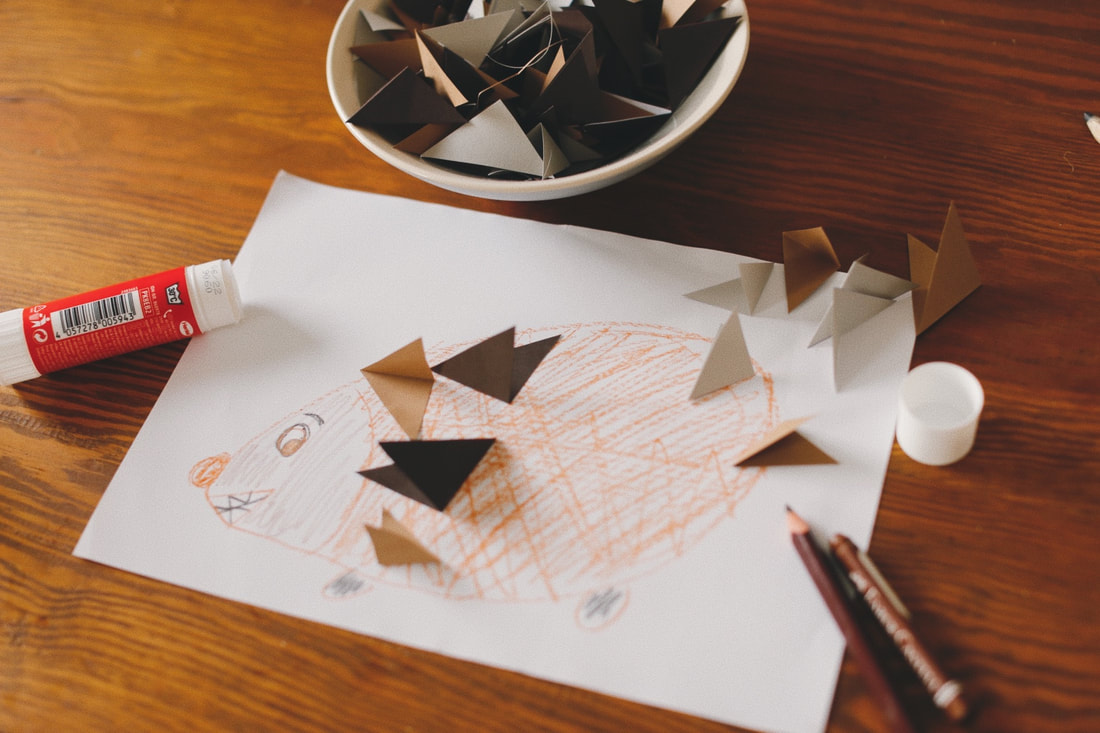
You will be cutting loads of paper while making the diamonds. Save all pieces and keep them for later. You can do some other projects with them or even use it to create fun things like this porcupine I made with Pepa. Always try to use all the material instead of throwing them away...
I hope you guys like this DIY! If you have any questions, just ask away. It is effortless to make, and the cost is almost nothing compared to regular mobiles on the market. Not to mention how proud you will feel when you see your baby admiring it and being entertained by it.